Showing posts with label classroom. Show all posts
Showing posts with label classroom. Show all posts
Tuesday, March 10, 2015
Can you really use Twitter in your Classroom
Twitter was one of those things that I just ignored. I thought it was a little bit indulgent and frivolous, that was until I got shown how teachers are using it for Professional Development. It is interesting how often it is now my first port of call if I am looking for a new Web 2 tool or an App that does a specific task. So how can you use twitter in the classroom? This post is also posted at Edtechtoolbox.
1. Make your own Textbook


We have used twitter in our class as a way of creating our own textbook. It was really a book for those students who wanted to complete some further reading around the subject we were studying. The class was studying a unit of work on Picasso and the Development of Cubism.
We created a class twitter account and then each time any of us found another online resource we retweeted it back to the school account. We then configured our Flipboard to feed from this account on to one of the content pages. The students had access to all of the resources in a format that easily resembled a magazine.
We actually found out about an exhibition that we were unaware was on and the gallery had these fantastic education kits that accompanied the exhibition. That alone made this a great activity.
http://itunes.apple.com/au/app/flipboard/id358801284?mt=8
2. Develop a whole Book with Chapters


Zite is similar to Flipboard. They both provide content that is provided by your twitter feeds. I like Zite because also like Flipboard you can set up different chapters or areas of interest. This would be ideal if you were doing a collaborative project. Each group could produce a chapter within your book by retweeting the relevant tweets they identify around a specific concept or issue. It is a great way to quickly produce an e-book that is specifically designed for your unit of work.
http://itunes.apple.com/au/app/zite-personalized-magazine/id419752338?mt=8
3. Crowd Source a Solution.

Wouldnt it be good to Crowd Source a real problem in your class, school or community. The students could start with brainstorming possible solution themselves and then they could ask the question of other classes who are also using twitter or even the classes of other teachers that are in your PLN. We all have some parents in our classes that are experts in their fields, we could rope them in as well.
4. Create a Class Newspaper.
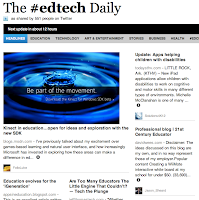
Use your class twitter account in the same way you did with Flipboard or Zite to create a class newspaper. This can be on a whole range of topics that you are studying or on a specific area that you are focusing on. Paper.li is an easy to use and visually appealing solution for creating these. You can have text sites, photos or even videos in your digital newspaper. These can be updated daily, weekly or whenever you change topics. Your Newspaper can be accessed by students in your class, your school or around the world. It is also a great way to let parents know about the topics you are studying in your classroom. I use them for Professional Development as well. There are a number of good ones around Edtech and Web 2 tools.
http://paper.li/
5. Create a real or online Scavenger Hunt with clues distributed via twitter.

I normally like to use QR codes for the clues in a Scavenger Hunt but just to mix things up I sometimes use Twitter. These Scavenger Hunts can be online like a WebQuest or a series of clues stashed around the school that lead the students to pieces of information that lets them decode the artwork or artist we might be studying that term.
6. Crowd Source a Story in Class.
This is an activity that you could do with paper and pen but it would be so much more fun doing it on your iPad or Laptop. Each student has 140 characters to add their part to a story. When they have finished they send a tweet to the next person. This is a great way to develop creative writing skills as well as making writing a fun activity for those who might normally struggle with a task like this. This would be even better if you then had the students who had already completed their 140 characters to animate it or drawing illustrations for it using Puppets Pals or Toontastic. This could be published as a digital book using one of the many online publishing tools like issuu.com.
7. Create Autobiographies.
Wouldnt it be an interesting exercise to get your students to write a 140 character autobiography. What would they say. How do you cut everything down to 140 characters. Talk about practicing writing a concise piece. This would also be a lovely insight into how your students see themselves. As you know yourself sometime it is harder to put everything into a set word limit than what it is to ramble on. Great way to get to the core of person.
8. Create a 140 Character Biography.
If you are doing a research task about artists, explorers or figures from history wouldnt it be great to get your students to complete a biography of that person or people within the 140 character limit. Again this is about writing in a concise manner - no room for waffle. This is another great opportunity to match up your activity with a drawing or sketch of the person made on an online drawing tool. Couple this exercise with a Voki avatar to then bring your character to life.
9. Summarise Your Work.
How many times do we need students to summarise a paragraph, a concept or a newspaper article so we know that they have an understanding of the issues discussed. Can they do it in 140 characters. This would be a great way to motivate a group of students to complete this task. Maybe they could do it in a series of tweets. You could even peer assess which are the best for each section and then publish a class set of study notes for an end of chapter review or before a end of unit exam paper.
10. Conduct a twitter debate
Now this is a favourite of mine. I love the fact that the students have to be very clear about what they want to say before they start to tap away. With only 140 characters at a time the arguments necessarily need to be lean. This makes for a more lively debate. I also find that the students who do not always vocalise well within the larger group are often happy to participate in these debates. This debating format has been a confidence booster for more than one of our students.
11. Follow a Topic or Issue:
Use Tweetdeck to follow specific # hashtags. Tweetdeck will filter the worlds tweets and only send those back to your Tweetdeck that contain the # hashtags that you have chosen.
This is a great way for students to follow the public opinion of an issue or event. It is also a great way for them to ascertain what are the concerns of those people who are for or against an issue. You can add or delete columns for # hashtags as many times as you like. This would work perfectly in conjunction with a tool like Archivist - which we profiled in a previous post.
The added advantage of a tool like this is you as the teacher can set up your own columns to keep abreast of new Web 2 tools, new Apps for Education or Edtech talk.

http://itunes.apple.com/us/app/tweetdeck/id429654148?mt=8

Monday, March 9, 2015
Classroom iPod touches iPads Dos and Donts
This is a great article by Tony Vincent over at http://learninginhand.com/
Even more relevant with the announcement of the iPad 2. The camera alone allows schools to use this more like a laptop. It is now a viable alternative to a 13inch Macbook. Anyway Tony has some really interesting and insightful tips learnt through experience. Enjoy
 "Bringing iPods and iPads into the classroom is a great way to give students access to learning tools. However, there are so many things to keep in mind to make the devices work smoothly in the classroom. While this list of dos and donts mainly addresses iPod touch the same advice goes for iPod touch and iPhone.
The list is for large or small class sets of handhelds; if students are using their own personal iPods youll have a different set of considerations and technical issues to deal with.
Dos
Do sync all iPods to one computer. Youll really be doing yourself a favor by syncing with one computer. You can add media to one computers iTunes Library and know that it will sync with all iPods. If you must use more than one computer for syncing, always sync the same group of iPods to the same computers. This will probably involve color-coding the iPods and computers. The one computer you sync with can be Windows or Macintosh. Some people report that Windows computers freeze when syncing more than a few iPods at once. Macs appear to work better at syncing multiple iPods simultaneously.
Do name iPods. The first time you sync an iPod you are prompted to give it a name in iTunes. Start the name with a number so iPods are listed in order under the Devices list. Include a zero in front of number 1-9 so the computers sure to list them correctly. You can always change an iPods name anytime using iTunes.

Do set each devices wallpaper with a number or name. An innovative way to identify iPods touches is to set the wallpaper image of each device to include its number or a name. This way you can simply press the Home button and the screen instantly lights up and displays the devices number. Wallpaper can be any image thats in the Photos app. That includes images synced using iTunes or images saved from mobile Safari or other apps. Ive made three sets of images that youre welcome to use as wallpaper. Read my post and download the image sets.

Do set iPods for automatic sync of all content. Configure each iPod to sync all audio, video, podcasts, and apps so that everything in the iTunes Library is automatically transferred to the iPod. This way there are no buttons to push or click. Simply plugging in the iPod will ensure that everything in the iTunes Library is synced onto the iPod. Refer to this PDF for directions. Each iPod will have to be configured separately in iTunes. But, once configured, you wont have to touch the settings again.

Do make playlists. Because everything in the computers iTunes Library will be synced onto the iPods, its a good idea to organize what you want students to access into playlists. Do this by click the + in the bottom-left of the iTunes windows. Name your playlist and then drag and drop audio, video, podcasts, and audiobooks onto it. You can click and drag to reorder items within a playlist. Upon next sync, the playlist will appear on the iPod.

Do delete content. Since you are mirroring the computers iTunes Library onto the iPods, deleting items from iTunes will delete them from the iPods. After you no longer have a need for a podcast, video, or audiobook, delete it so it is not taking up room and cluttering up the iPods. Chances are you want to use this content with a future class. If its something you will use again, drag and drop it into a folder on your desktop. You can drag and drop it back into iTunes for the next time you want it synced to iPods.
Do configure the Music app for easy access to playlists and podcasts. I wish the Music app on iPod touch was named Audio instead because that is where you listen to any audio and access podcasts. As its name suggests, the app is set up for listening to songs. With a few changes, you can make it easier for students access educational content on the iPod. First, launch the Music app and tap the More button. Then tap Edit. Drag the Playlists, Podcasts,and iTunes U buttons to the bottom of the screen. If you use audiobooks you can drag that too. Youll need to do this on each iPod touch (or better yet have students do it). Now when the Music app is launched, students have quick one-tap access to whatever buttons you added to the bottom of the screen.

Do label or engrave iPods. Its important for teachers and students to be able to identify iPods. Giving iPods numbers is helpful. Some schools engrave numbers on the iPods backs. Unfortunately, this number cannot be seen when the iPod is in a protective case. Putting a sticker on the front or writing the number on the case is helpful. Be sure the number matches the number you gave the iPod in iTunes. Additionally, having a variety of colors for cases can make it easier for students to spot their iPods.
Do set up an iTunes account for the classroom computer. Most prefer to keep their personal iTunes account separate from their school account. Now, you do not need an iTunes account to download podcasts and iTunes U collections. You do need an account if you plan to download audiobooks and apps, even if you are will only download free apps. iTunes usually requires a credit card to be on file when you create an account unless you follow these directions. You can sync all of the iPods using that one account. Everything you download with that account will be locked to that account and can only be installed from computers that are authorized with the accounts Apple ID and password.

Do know you can authorize more than one account on a computer. If you bought software using a different account from your classroom account, it is possible to also authorize your account in addition to your school account ron the classroom syncing computer. Click Authorize Computer from iTunes Store menu and enter your Apple ID and password. Realize that you can authorize an account on up to five computers. When you deauthorize your account on the computer the apps and audiobooks that are associated with your account will be deleted from the iPods.

Do use a flash drive to transfer apps between computers. When you purchase an app in iTunes it is downloaded and stored on your computers hard drive. That same app file is then copied to all iPods that sync with your iTunes Library. There might be times you download apps on a computer other than the one you use for syncing. In this case you will need to copy the apps from the original computers Library onto the new computer for syncing with iPods. The easiest way is to use a flash drive. On the first computer click Applications under Library. Then drag and drop the apps you wish to copy onto the flash drive. They appear as .ipa files with an iTunes icon. Eject and insert the flash drive into the computer used for syncing. Drag the apps from the flash drive into the iTunes Library. If the apps were downloaded or purchased under a different iTunes account than the one on the syncing computer, you may have to authorize your account (see above).

Do get a charging cart, case, or tray if you have the money. Bretford makes thePowerSync Cart for iPod. Its pricey at about $2300. For about half the price they offer thePowerSync Case. TriBeam is another company that makes carts and trays for syncing iPods. Also, PARAT Solutions makes Parasync, and they have created a product comparison chart. An advantage to these solutions is that each iPod has its own slot. Numbering these slots allows the teacher to quickly see which iPods are missing. If you cannot afford a cart or case, do buy a couple of powered USB hubs so you can sync and charge several iPods at once. If you stagger connecting the iPods, you can sync and charge an entire class set without buying expensive equipment.

Do have procedures for passing out, turning in, and syncing. Will students get their iPod as they enter the classroom? Do you have a helper student who will pick up the iPods? How will you know when all iPods have been turned in? There are lots of ways teachers manage iPods in the classroom. The key is having procedures for everyone to follow.
Do secure iPods when not in use. Have a place to lock up the iPods. Its no fun when an iPod is stolen.

Do have earbuds for each student. Something else that isnt fun is using earbuds that someone else has stuck in their ears. You can get inexpensive earbuds at Walmart andonline. Most students probably already have their own earbuds. Earbud wires do tend to get tangled. Those in elementary classrooms may consider putting a hook on a wall for each student. Label the hooks and earbuds so students can drape their earbuds from the hooks when not in use as a way to keep the wires tangle-free.

Do create a web clip icon for your class or school website. A web clip is an icon you can add to your Home screen as a shortcut to a website. With one tap, Safari will open to the web clips page. To make a web clip, simply open the page in Safari. Tap the Plus sign at the bottom of the screen. Tap Add to Home Screen and edit the title (if you want). Tap Add and, presto, a new icon is added to your Home Screen. This will need to be done on each iPod individually. Adding a web clip to your class website enables you to add a link to your site that students can easily access on their iPods without typing in a web address.

Do use a URL shortener. If you dont have a class website or dont have time to update it, give wen addresses for students to type in using a URL shortening service. Sites liketinyurl.com and bit.ly take longer web addresses and make them shorter. The shorter the URL the easier they are to type on an iPod touch. Read more about shrinking long web addresses.

Do have consequences for misuse. Unfortunately, students will be tempted to use iPods inappropriately. Ive found that taking away the iPod is an effective consequence for misuse. Students who have continual problems with misuse should be seated so that the teacher can monitor their activities. Maybe even point a video camera on a tripod at the students screen so that the student knows the teacher is always "watching."
 Do create a usage contract. A contract is an effective way to communicate how and when an iPod can be used. Have students and parents sign the contract to indicate they agree to follow the rules and accept the consequences for breaking the rules. You may want to model your contract after some of these:
Culbreth Middle SchooliNtouch ClubLenape iPod Touch 1:1 User AgreementInformation and Communication Technology (ICT) Use ContractELL iPod Agreement
Do set up email.. Like it or not, email is the primary way to get some information off the iPod and onto a computer. If students are assigned their own iPods, then it makes sense to set up each iPod with the students email account. Some schools use Gaggle.net email, which can be configured to work on iPod touch. If students do not have their own email or students share individual iPods, you may want to set up each one with a free Gmail account. The problem with setting up all those accounts is the time involved and the difficulty in monitoring so many accounts. An alternative is to create one Gmail account to be used on all iPods. So that you can tell which iPod an email originated from, type in the number of the iPod or the name of the student in the Email settings Name field. This will need to be set up individually on each iPod. Additionally, be sure the teachers email address is added to the address book so students can easily send what they create on the iPod touch to the teacher.

Donts
Dont give students the iTunes account password. If you give them the password, they can download apps right from the iPod itself. Apps downloaded on one iPod will eventually be synced to all iPods so a single problem could grow larger. Teachers should be in complete control over what is loaded on the devices, so they should keep passwords to themselves.

Dont sync iPods with any other computer than the original. If an iPod is attached to a different computer you will get messages that content on the iPod will have to be erased. You probably dont want that. If you click Cancel, the iPod will charge but wont sync.

Dont feel you need to sync iPods everyday. Chances are you wont need to sync iPods everyday. You only need to sync when there are new podcasts, audio, video, or apps you want to put on the iPods. If you plan ahead, you can make it so syncing is required only weekly and perhaps monthly. Depending on use, however, iPods will probably need to be charged every couple days.
Dont spend too much on iPods. The 8GB iPod touch is the most affordable. Is 8GB enough? For most, yes, 8GB is plenty for dozens of apps, lots of audio, and a few videos. You can see how much of the available memory is taken up by viewing each iPods capacity gauge. The gauge is found in iTunes under the Summary tab for each iPod.

Dont buy expensive accessories. Apple sells $30 earbuds with microphones, $30 cases, $20 syncing cables, and $30 wall plugs. Monoprice sells $4 earbuds with microphones, $1cases, $2 syncing cables, and $4 wall plugs.

Dont mistreat batteries. iPods use lithium-ion batteries. These batteries will lose capacity over time. The worst thing you can do is store iPods somewhere hot, like a car in the summertime. Its also not healthy for lithium-ion batteries to be completely discharged. For healthiest batteries, store iPods at about 80% charge over the summer (be sure to completely power down the iPods over the summer as well).

Dont use liquids to clean the screen. You dont want liquid getting inside. Microfiber clothes clean the screens nicely. If the screen is really gunky, put a small amount of water on a cloth and then clean the device.
Dont put up with a glitchy iPod. iPods can easily be restored to factory settings if something gets out of whack (or if a student decides to lock the iPod and forget the password). Read about restoring.

Dont forget professional development. Theres always something new to learn when it comes to teaching and learning with iPods. Consider booking a workshop with me, Tony Vincent, and my workshops can even be attended by students. Dont forget that I offer apodcast for iPod-using educators. Additionally, there are plenty of other great websites out there where educators are sharing their iPod touch activities, ideas, and resources."
Tony Vincent - http://learninginhand.com
35 sites for iPads in the Classroom Resources
Here is a fantastic list of 35 sites you can use when using the iPad in a classroom. The list was compiled by Julie Greller a Media Specialist with over 20 years experience. She has found some really clever sites with lots of ideas for using the iPad in the classroom. This would make for some light weekend reading. Enjoy!

Read more »
http://mediaspecialistsguide.blogspot.com/2011/10/38-sites-on-using-ipads-in-classroom.html#.Tqta02BveLG
Sunday, March 8, 2015
Involve Prepare Apply and Develop iPads in the Classroom
A fantastic article by Autumn Kelley on 23rd March over at techlearning.com. Autumn discussed the use of iPads in a setting with special needs kids. I couldnt help but equate the pertinent points about how the iPads increased learning opportunities in her situation, with my own students. The four key principles about integration - Involvement, Preparation, Application and Development; are universal in the introduction of all technology and learning. This is a model that any teacher could use to educationally empower their students. Anyway enjoy Autumns article.

Image sourced from www.allnewsmac.com
Technology opens doors to learning and builds bridges to learning concepts for kids with special needs. SESI(Specialized Education Services, Inc.)—an organization of alternative schools and specialty programs that operate across the country (currently in AZ, CA, DE, MA, MD, MO, RI, VA, and Washington, DC)—uses iPads to supplement instruction in reading and math as well as to facilitate communication for students with autism spectrum disorders and others who require support through the use of augmentative communication devices.
SESI follows four key principles concerning iPad integration in our classrooms:
I = Involvement
P = Preparation
A = Application
D = Development
Developed by SESI’s department of curriculum and instruction, under the leadership of Autumn Kelley with technological support by Adrian Pellew, director of technology, these four principles form the corners of the learning model our teachers employ to support options for iPad use in fun, creative ways for kids with a wide variety of needs. The principles of Universal Design for Learning (UDL)—a philosophy that integrates supports for all learners, often through the use of technology—comprise the foundational framework for iPad use in our schools. Endorsed by the U.S. Department of Education, UDL provides the support required by those with special needs as an integrated feature of the instructional design. Content and support become one in iPad-assisted learning experiences.
The iPad applications developed by speech and language experts, which are commercially available via the Apple App Store, are used throughout the day to enhance learning for our students who have specific communication needs. These learning applications promote student engagement in reading and math as they are carefully woven into classroom instructional practice, providing independent and collaborative learning opportunities for students experiencing reading and math skills delays at any grade level.
At each stage, collaboration between students and teachers is key. “Technology provides avenues for one-to-one instruction in the classroom setting that didn’t exist 10 years ago,” said Michael Kaufman, CEO and President of SESI. Indeed, iPad use in our schools has proved an efficient avenue for improving core academic skills for our most challenging students and for empowering our teachers to adapt technology in support of advancing students learning.
Step 1: Involve
Students with communication disorders can easily be marginalized from group learning experiences in the classroom setting if they are not provided a “peer-friendly” way to communicate. Prior to the introduction of the iPad into this setting, their involvement was limited by a self- and peer-imposed communication barrier. “The iPad extends the involvement of children with limited speech ability,” said Brooke Violante, SESI’s Connecticut Regional Director of School Services. “Seeing our children with speech limitations interact in group instruction with peers brings the classroom to life and greatly expands their interaction.”
Apps on the iPad—such as MyTalkTools Mobile, Proloquo2Go, Artikpix, and iCommunicate—allow our students to interact with other students in conversations about animal dissection during science lab, for example; to participate in a group discussion about their local community during social studies; and to share YouTube videos about a math skill they are trying to master in math group. “Giving students with communication disorders access to an iPad for communication sets them center stage in the learning process,” commented Stacy King, classroom teacher at SESI. Student learning teams can use handheld access to the Internet to support research and topic exploration in creative ways.
Step 2: Prepare
In addition to using the iPad to increase student involvement in school, it can be used to lay the groundwork for teaching in the first place—prepping and organizing instruction materials for both students and educators. For instance, prior to a lesson, teachers preload the iPads with mini-lessons on the chosen topic from SchoolTube, YouTube, Google, or Yahoo. Upon entering the classroom, students select the iPad device of their choice and then spend the first few minutes of the period “warming up” on the software to prepare for the lesson content.
Applications such as Notes, Popplet, and Papers help the middle and high school student with memory-based learning deficits to learn from notes, lectures, and readings. Students can prepare for statewide testing through a review of key math skills using apps like MathBoard, Pad Math, and Math Bingo. Reading classic high-school-level novels is often a challenge for students with reading disabilities, but the iPad facilitates success for these students with its built-in, at-the-fingertip supports such as text-to-speech, Wikipedia/Google in text, text magnification, and a wealth of apps that incorporate video clips and real-life descriptions of literary meanings. Apple’s preparatory teaching applications thus allow students with reading challenges to access and master grade-level content in pace with their nondisabled peers.
Step 3: Apply
Teachers apply the iPad device to an extensive variety of learning programs, not just for core subject matter, but also for vital elective content like music and the arts. The mobility of the device and the universal nature of its fingertip access have expanded its use beyond the classroom. Music classes, for example, benefit from such apps as miSoft Music!, Classical Music Listen and Learn, and Sheet Music Treble Game by increasing appreciation, exploration, and application of musical principles to course content. And user-friendly graphics, such as touch play with a screen-activated record player and live feed to YouTube and Twitter (which can include images of students’ compositions), have opened the doors even further on the ways in which technological innovations can influence learning and play in music curriculums.
The iPad can virtually deliver a field-trip experience to an art museum for students, with the touch of a hand. One’s artistic vision can expand full-scale with such apps as Art Authority for iPad and Art Museum (Match’Em Up History & Geography), which offer students the chance to study art by simply touching the image on the screen to instantaneously access detailed information about content and creator. The works are organized by time periods to improve students understanding of key artistic features that define each decade.
The ability to cut-and-paste and import various artwork pieces to external applications and presentation software on the computer further enhances student study of color, line, shape, and visual communication of texture. Students can then apply these lessons as they transfer historical tenets of art into their own creative projects.
Step 4: Develop
Finally, since the iPad is less a tech device and more a portal for access, it is particularly well -suited to help students with special needs take advantage of learning opportunities in the classroom. Students with learning challenges need access to information that can support them when they feel lost or off topic with grade-level content, and this is precisely what the iPad can furnish.
When a subject they are unfamiliar with is brought up in history class, for instance, the iPad is right there, loaded with themed apps, offering entrance to any web-based platform of historical information, or even containing a reference outline the teacher e-mailed to the device, containing composition tips and help on study questions. Or when communication-impaired students need a peer-accepted way to communicate with someone in the lunch line, the iPad is there with apps that allow them to “talk” to others in “cool,” socially acceptable ways.
The iPad develops educational experiences for students with special needs in ways that deliver information, facilitate communication, and enhance their learning experience throughout the term of the school day and beyond. The four principles of iPad learning—involvement, preparation, application, and development—infuse all facets of student learning and teacher implementation, and they lead to virtually unlimited schoolwide innovations. The iPad serves as a powerful technological portal, guiding today’s learning experiences toward the lessons of tomorrow.
Autumn Kelley is the Director of Curriculum and Instruction for Specialized Educational Services, Inc.
http://www.sesi-schools.com/
Subscribe to:
Posts (Atom)